
A proper car wash is not just about making your ride look good in the driveway. Done right, it protects your paint, extends the life of your tires, and keeps every surface performing the way it should. Here is the exact process used by enthusiasts who take their results seriously.
What You Will Need
Follow these steps in order. The sequence matters. Starting inside means any dust, crumbs, or debris you kick up during vacuuming stays off your freshly cleaned exterior.
Clean the Interior First
Start by removing any trash and loose items. Vacuum all seats, carpets, and floor mats thoroughly. Wipe down hard surfaces like the dashboard, center console, door panels, and steering wheel with an interior detailer or an all-purpose cleaner diluted appropriately for each surface. Avoid silicone-based products on the steering wheel since they reduce grip. Finish with glass cleaner on the inside of all windows using two microfiber towels: one to apply and agitate, one to buff off. Interior glass picks up film from outgassing materials over time and significantly impacts visibility.
Park in the Shade and Prep Your Buckets
Never wash a car in direct sunlight. Heat causes water and soap to dry on the surface before you can rinse them off, leaving water spots and streaks. Find a shaded spot or wash early in the morning. Set up your two-bucket system: one with soapy water for your mitt, one with clean water to rinse it between each panel. Drop a grit guard into each bucket to trap dirt at the bottom where your mitt cannot reach it.
Start With the Wheels and Tires
Wheels are the dirtiest part of the car. Brake dust, road grime, and grease build up fast and they will contaminate everything else if you leave them for last. Spray your wheel cleaner generously on each wheel, let it dwell for 30 to 60 seconds, then agitate with a dedicated wheel brush. Get into the spokes, the barrel, and the lug nut pockets. Rinse thoroughly before moving to the next wheel.
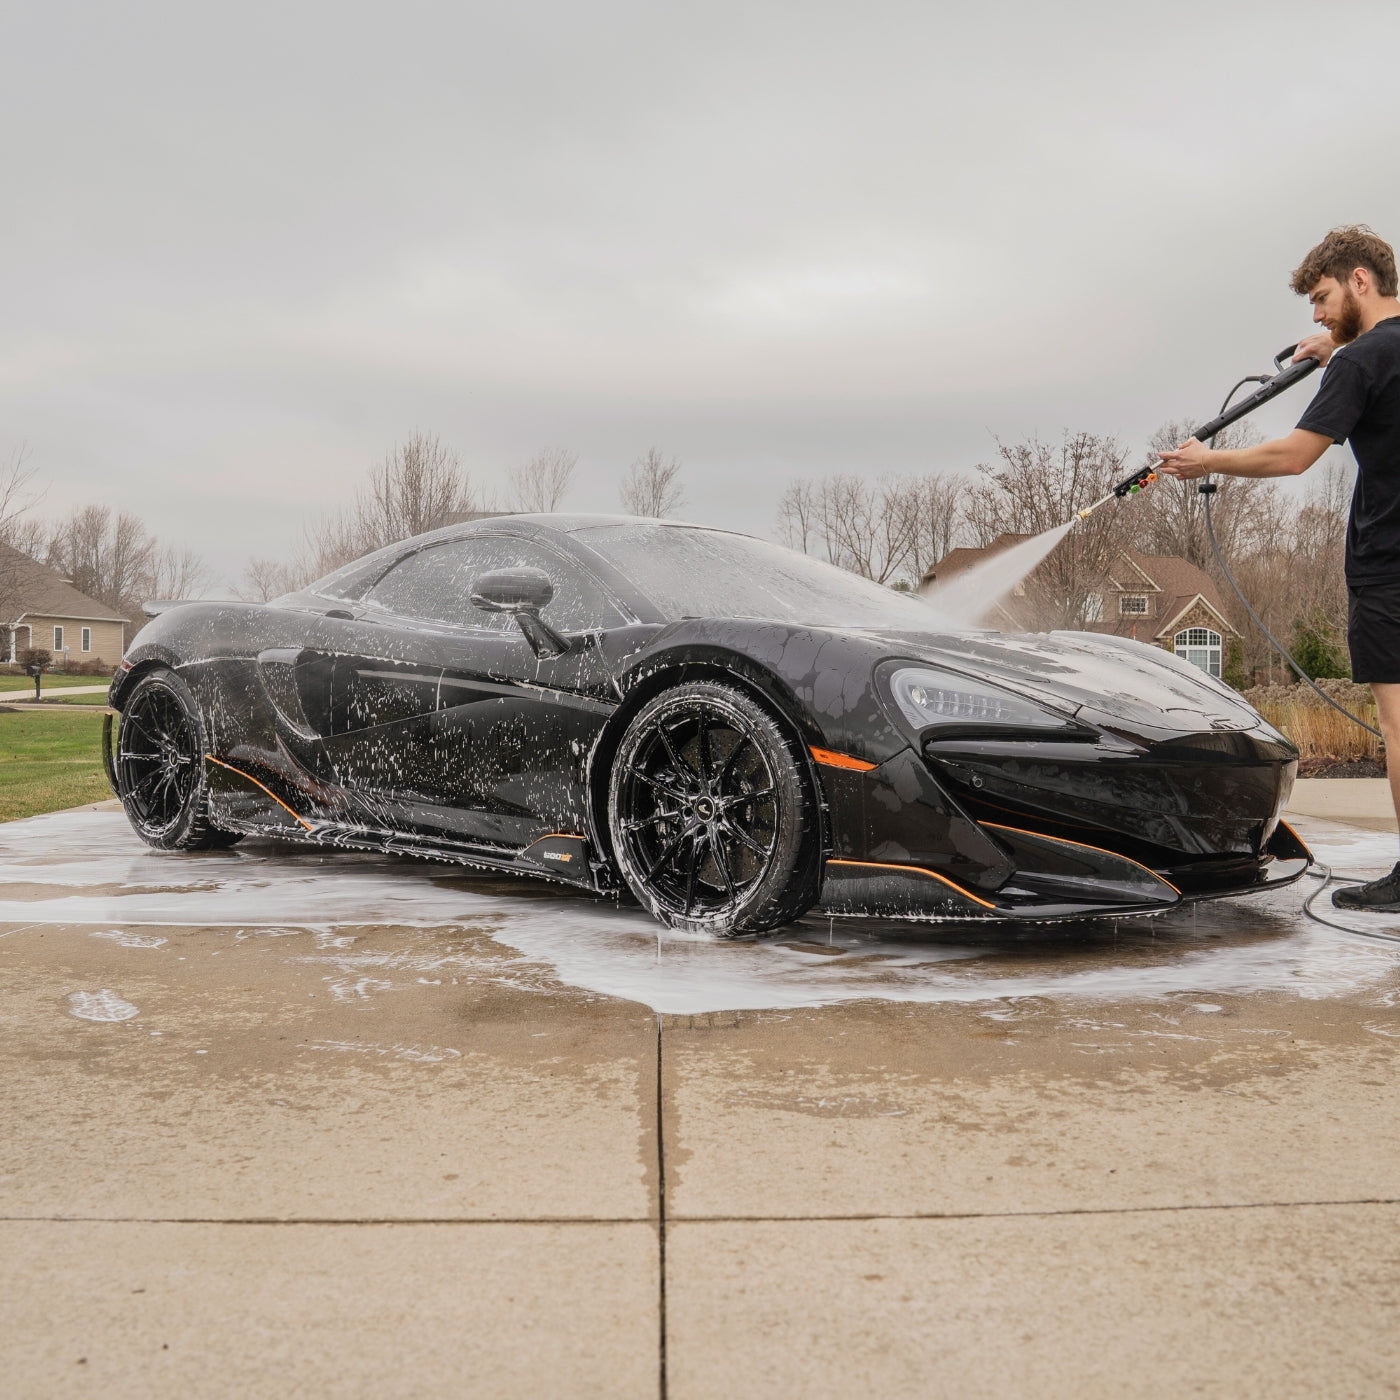
Pre-Rinse the Entire Car
Before touching the paint with a mitt, rinse the entire car from top to bottom with a hose or pressure washer. This step knocks off loose dirt, bird droppings, pollen, and debris that could scratch the paint if dragged across it. Pay extra attention to panel gaps, side mirrors, grilles, and the lower sections of the doors where mud accumulates.
Wash the Paint Using the Two-Bucket Method
Load your mitt with soapy water and wash one panel at a time using straight, overlapping lines. Never use circular motions, they drag dirt back and forth and cause swirling over time. After each panel, rinse your mitt in the clean water bucket, wring it out, and reload with fresh soapy water before moving on. Work top to bottom: roof, then hood, then trunk, then upper doors, then lower panels last. The lower third of your car is the dirtiest zone, save it for the end.
Clay Bar Treatment (Recommended Every 3 to 6 Months)
After washing, run your fingertips lightly across the paint. If it feels rough or gritty, like sandpaper, those are bonded contaminants that shampoo alone cannot remove. A clay bar pulls them out of the clear coat by physical deformation. Spray a panel with clay lubricant, fold your clay bar flat, and glide it across the surface in straight passes. Fold and knead the clay after each panel to expose a clean face. This is the step that makes your paint feel like glass.
Final Rinse
Do a full rinse from top to bottom. If you have a hose without a nozzle attachment, you can let water sheet off the car in a flood rinse by holding the hose close to the surface at low pressure. This leaves less standing water behind and makes the drying step faster. Pay attention to door handles, fuel caps, and mirror bases where water collects and drips late.
Dry the Car Immediately
Do not let the car air dry. Minerals in tap water will bond to your paint and leave spots that require correction to remove. Use a large, plush microfiber drying towel and work panel by panel from the top down. Lay the towel flat and drag it gently rather than rubbing in circles. A leaf blower or forced air dryer is excellent for blasting water out of panel gaps, mirrors, and emblems where towels cannot reach.
Dress the Tires
Tires take a beating from UV exposure, road chemicals, and heat cycles. Untreated rubber oxidizes, turns brown and chalky, and ages prematurely. After your tires are clean and fully dry, apply a tire dressing to restore color and protect the rubber. Use an applicator to spread product evenly across the tire face. Wipe off any overspray from wheels before it dries.
Apply a Quick Detailer or Spray Sealant
With your paint clean and dry, this is the perfect time to apply a spray sealant or quick detailer to add gloss and a layer of protection. Spray on and buff off with a clean microfiber panel by panel. This step intensifies the depth of your paint, adds slickness that makes future washes easier, and gives paint short-term protection against UV, water, and light contamination. If your paint has a ceramic coating already applied, use a coating-specific topper instead.
Final Walkthrough
Step back and do a slow lap around the car. Check for any missed spots, drips, or streaks. Look at the glass from multiple angles in the light. Check that the tires are evenly dressed and no dressing has crept onto the wheel faces. Wipe door jambs if needed since they get overlooked in the main wash and hold water. Pop the hood for 30 seconds to check for anything that splashed in. When everything checks out, you are done.
Final Thoughts
A proper wash is not a complicated process, but most people skip steps, rush the drying, or use the wrong products for the job. When you work through the correct sequence and use tools built for each specific task, the results hold up longer and the process gets faster every time. Consistency matters more than perfection on any single wash.
If you are washing your car every two to four weeks, protecting your tires with Gloss Lock, and tackling brake dust with Brake Bomber before it bakes onto your wheels, your vehicle stays cleaner between washes and every detail session takes less effort.
Build the habit. The car rewards it.
Get the Right Products for the Job
Gloss Lock, Brake Bomber, and more available at Stealth Supply.
Shop Detailing Products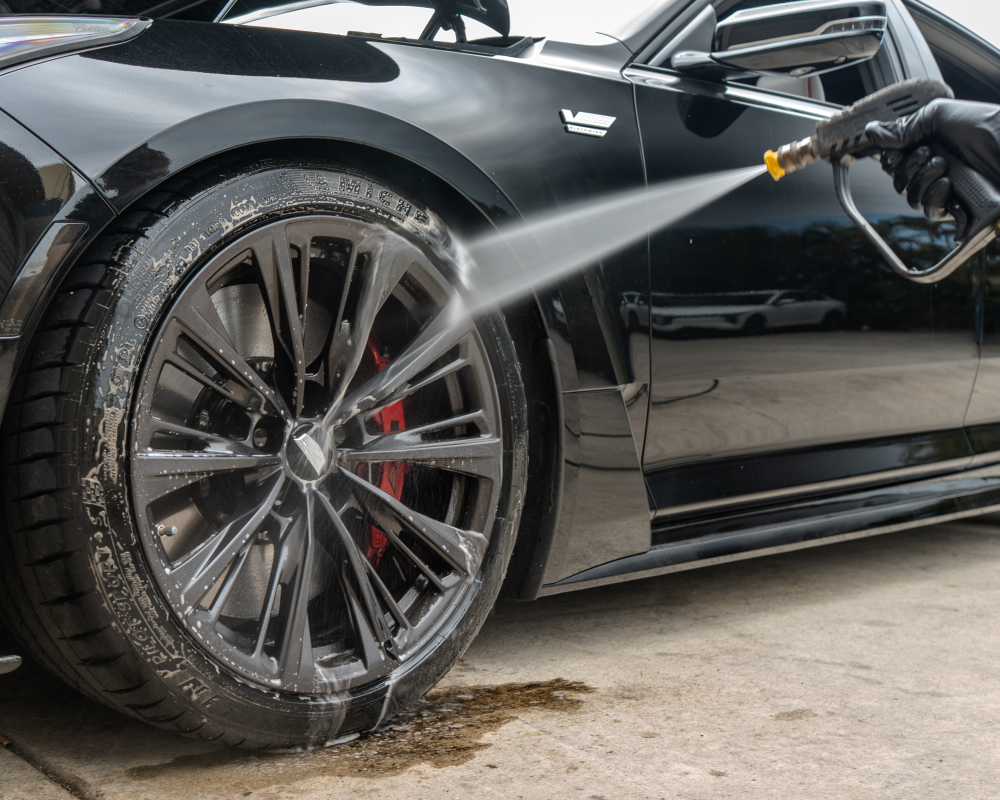


Leave a comment
This site is protected by hCaptcha and the hCaptcha Privacy Policy and Terms of Service apply.